These chocolate hazelnut tartlets are delicious, quick and easy to make and gluten-free! Plus you only need a handful of ingredients to make this healthy no-bake snack!
For more healthy no-bake recipes, check out our 4-ingredient hazelnut cookie dough and date-sweetened gluten-free chocolate chip cookies.
Once you make these chocolate hazelnut tartlets, there’s no going back to store-bought desserts.
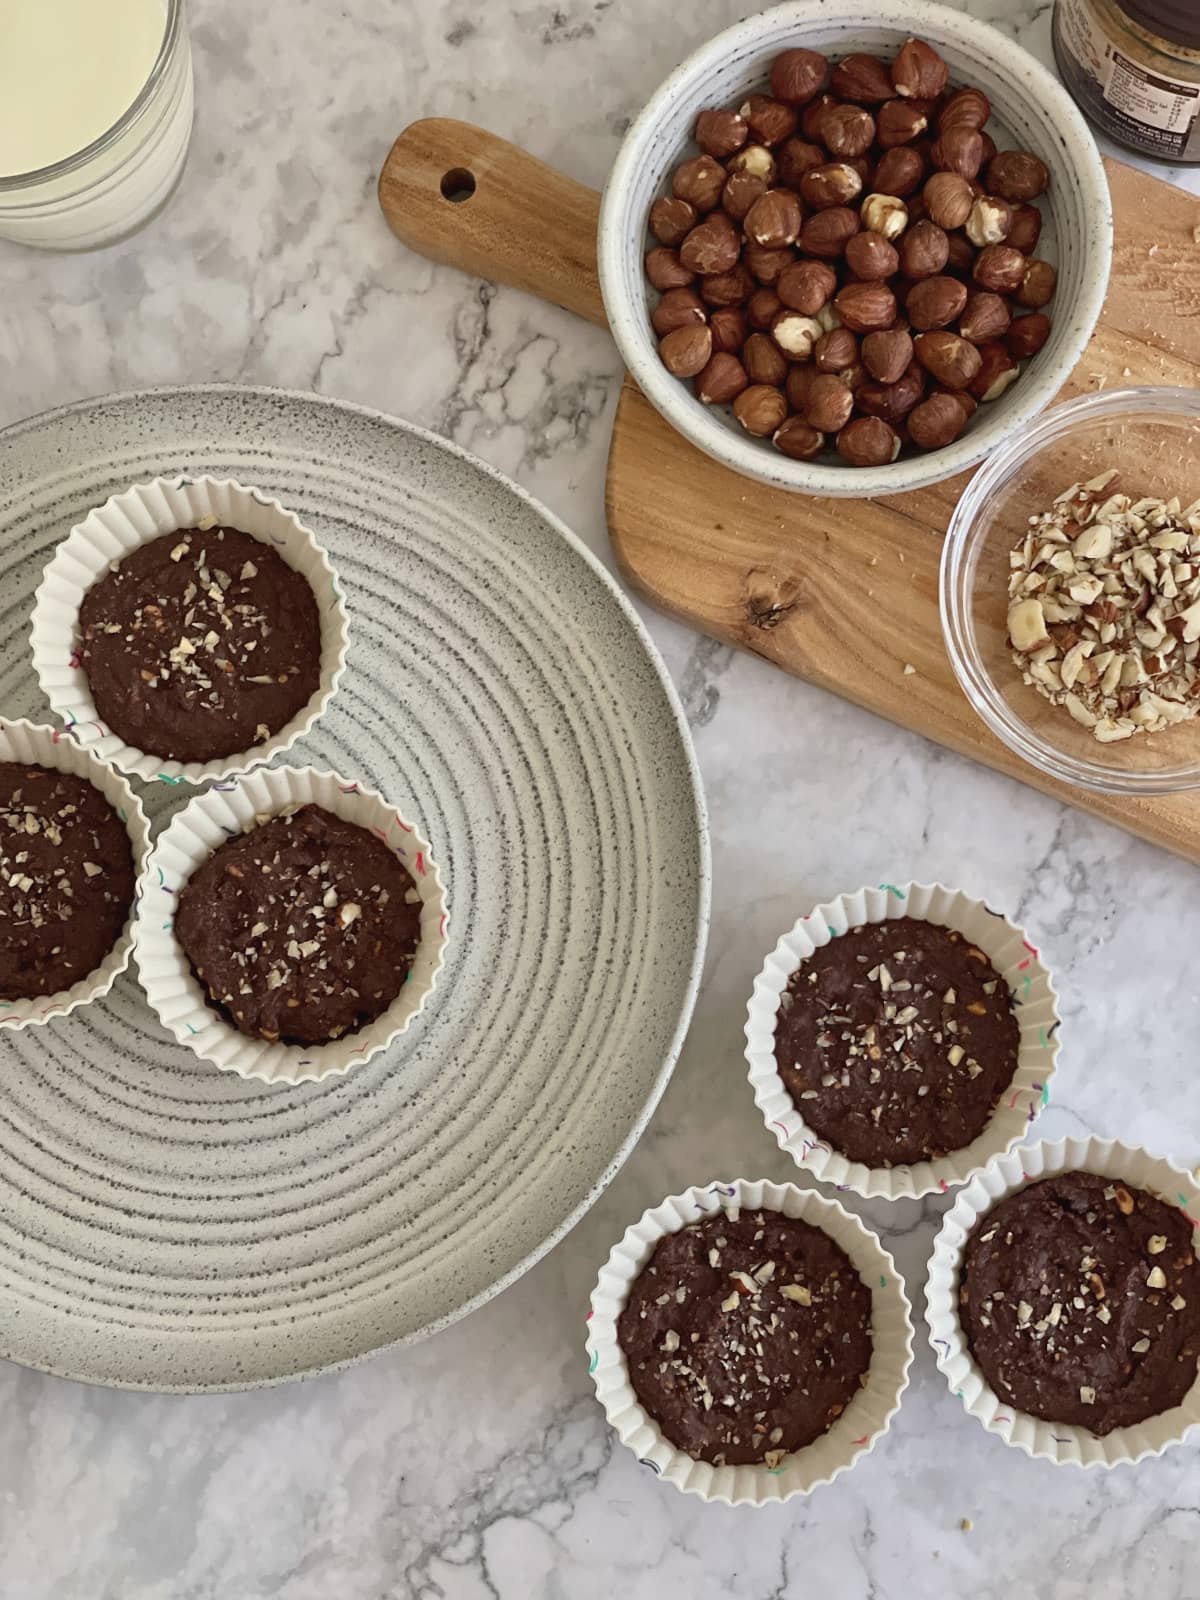
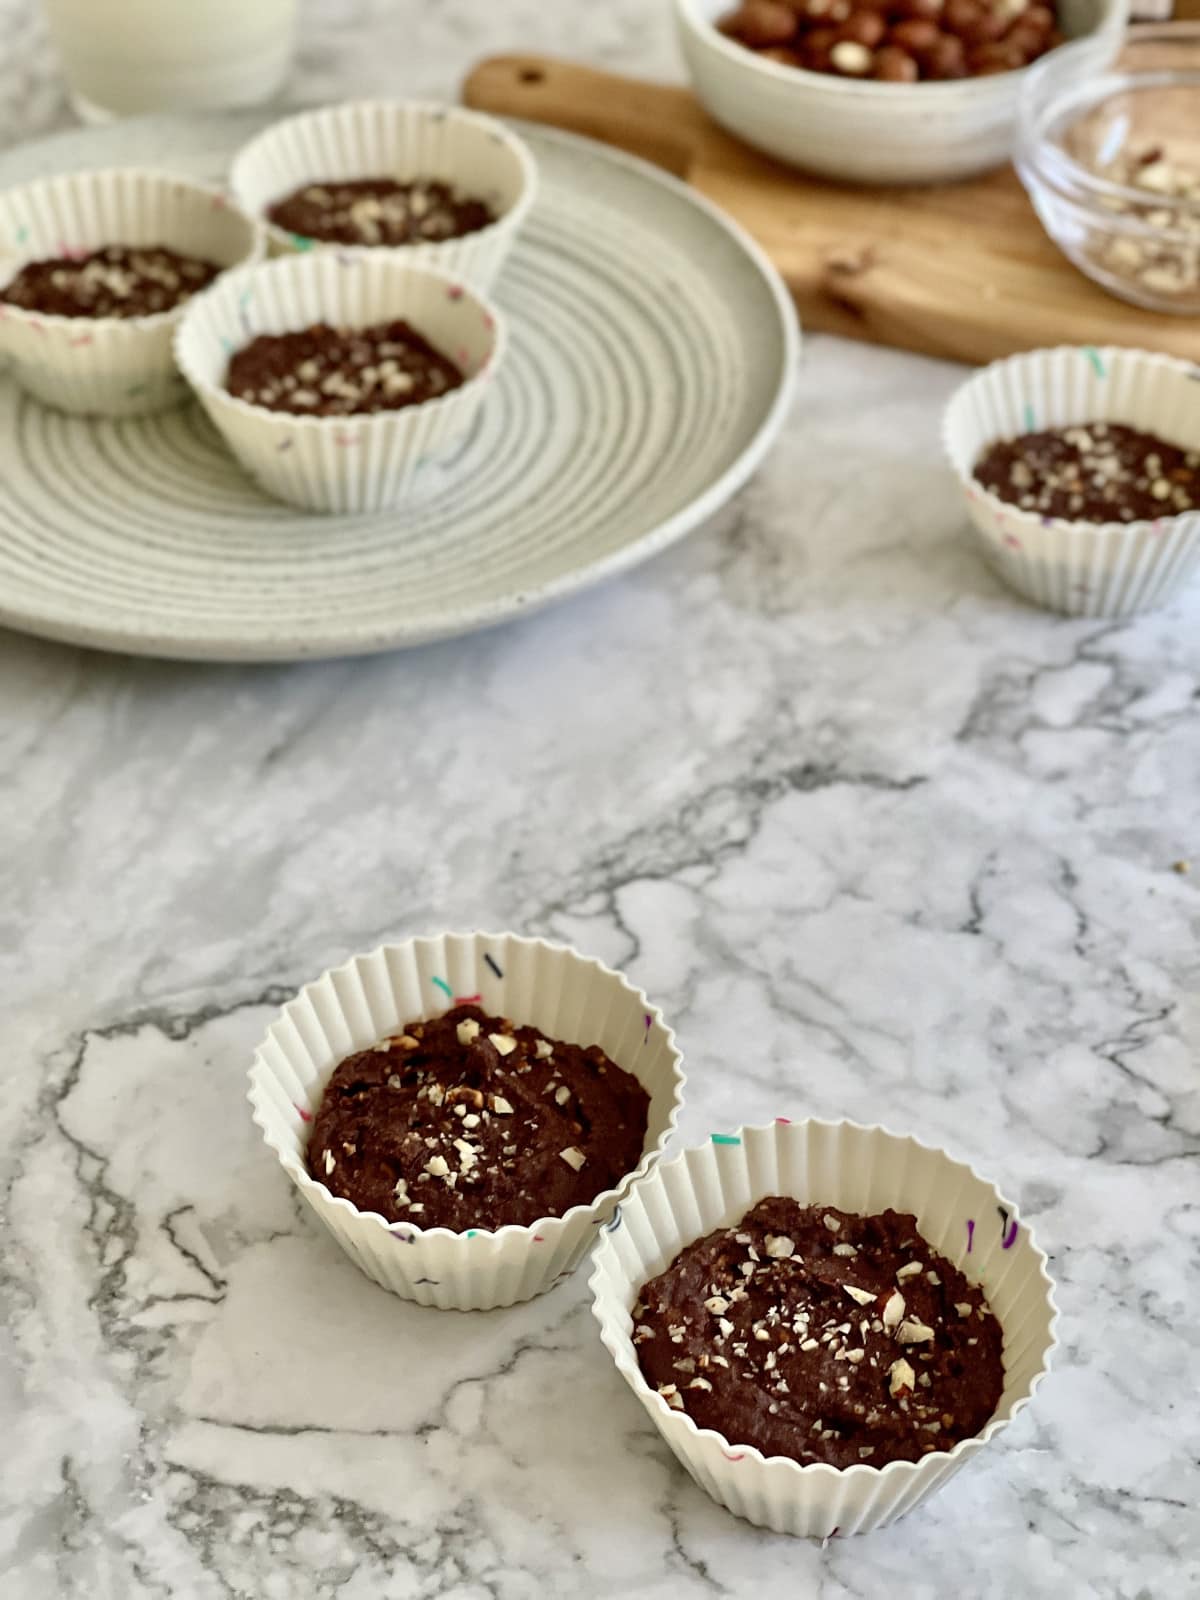
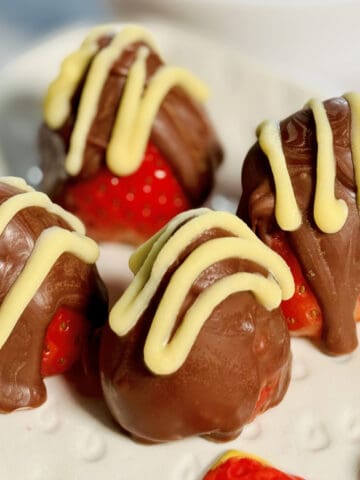
These chocolate hazelnut tartles feature no-bake chocolate tart shells with a layer of fudgy chocolate hazelnut spread, topped with crunchy hazelnuts.
This little treat is everything you want: rich, fudgy, and packed with irresistible chocolate and hazelnut flavor.
The first time I tried these I knew there was no going back. It’s a game-changer and every bite has a fudgy goodness that is too good to resist!

Jump to:
Why This Recipe Works
- Delicious flavor: Every bite bursts with deep chocolatey goodness and hazelnut flavor. It's a wonderful snack with the perfect balance of chocolate and hazelnut.
- Healthier alternative: No refined sugar and made with wholesome ingredients including raw cacao powder and almond flour. This recipe combines the comfort of double chocolate hazelnut tart and a mini chocolate hazelnut pie - in a small bite-sized and healthier way, without the heavy cream/double cream or pastry!
- Gluten-free friendly: this recipe is gluten-free friendly and has no refined or all-purpose flour.
- Minimal effort, maximum reward: One bowl, a handful of ingredients, and no oven or food processor required! Simply mix, freeze for 10 minutes, and enjoy. Enjoy as a simple weekday snack or dessert - or as a healthier option for special occasions!
Notes on Recipe Ingredients
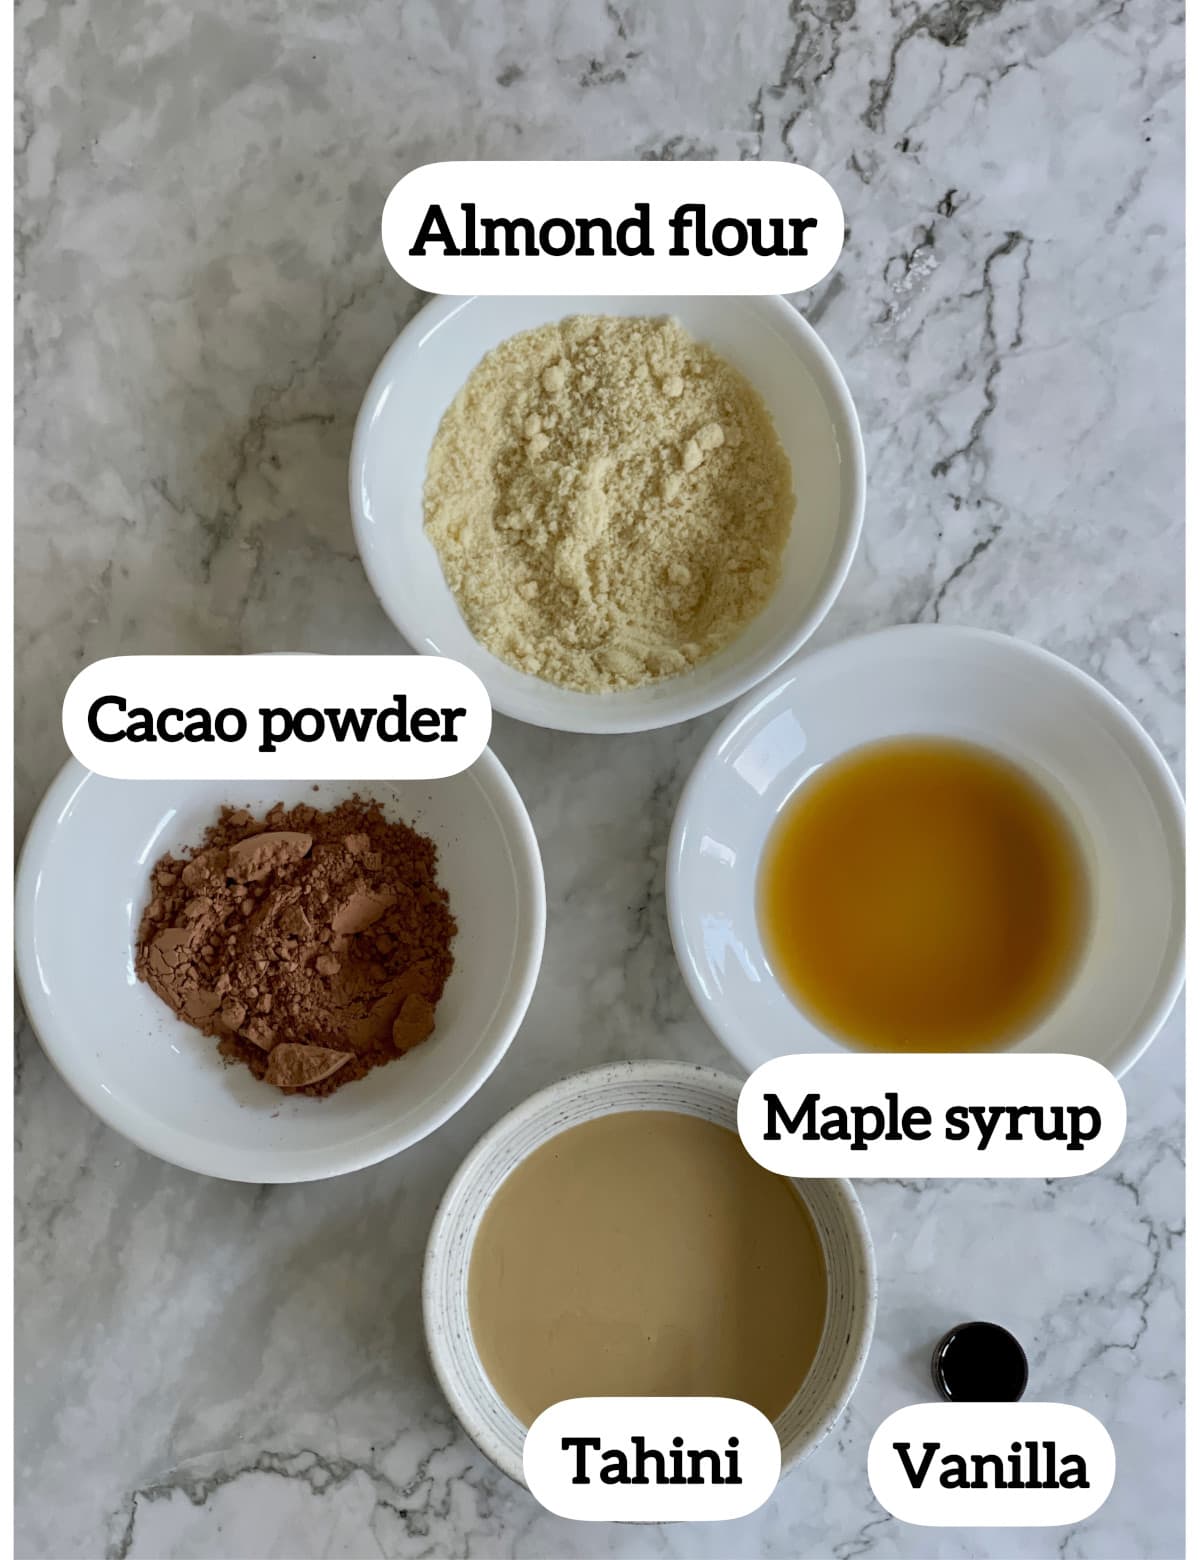
For the chocolate cups/shells:
- Almond flour: use blanched almond flour (this is without the skin). If you are in the UK I recommend this almond flour.
- Raw cacao powder (or cocoa powder): this adds a rich chocolate flavour in the cups.
- Tahini: tahini adds a unique flavour in the chocolate cups, you can substitute with hazelnut butter if preferred.
- Maple syrup: use grade A refined sugar-free maple syrup, this adds sweetness
- Pure vanilla extract (optional): optional but recommended for a hint of vanilla taste and also enhances the chocolate flavor. Look for vanilla extract without added sugar. (If you are in the UK - I recommend Taylor & Colledge vanilla extract).
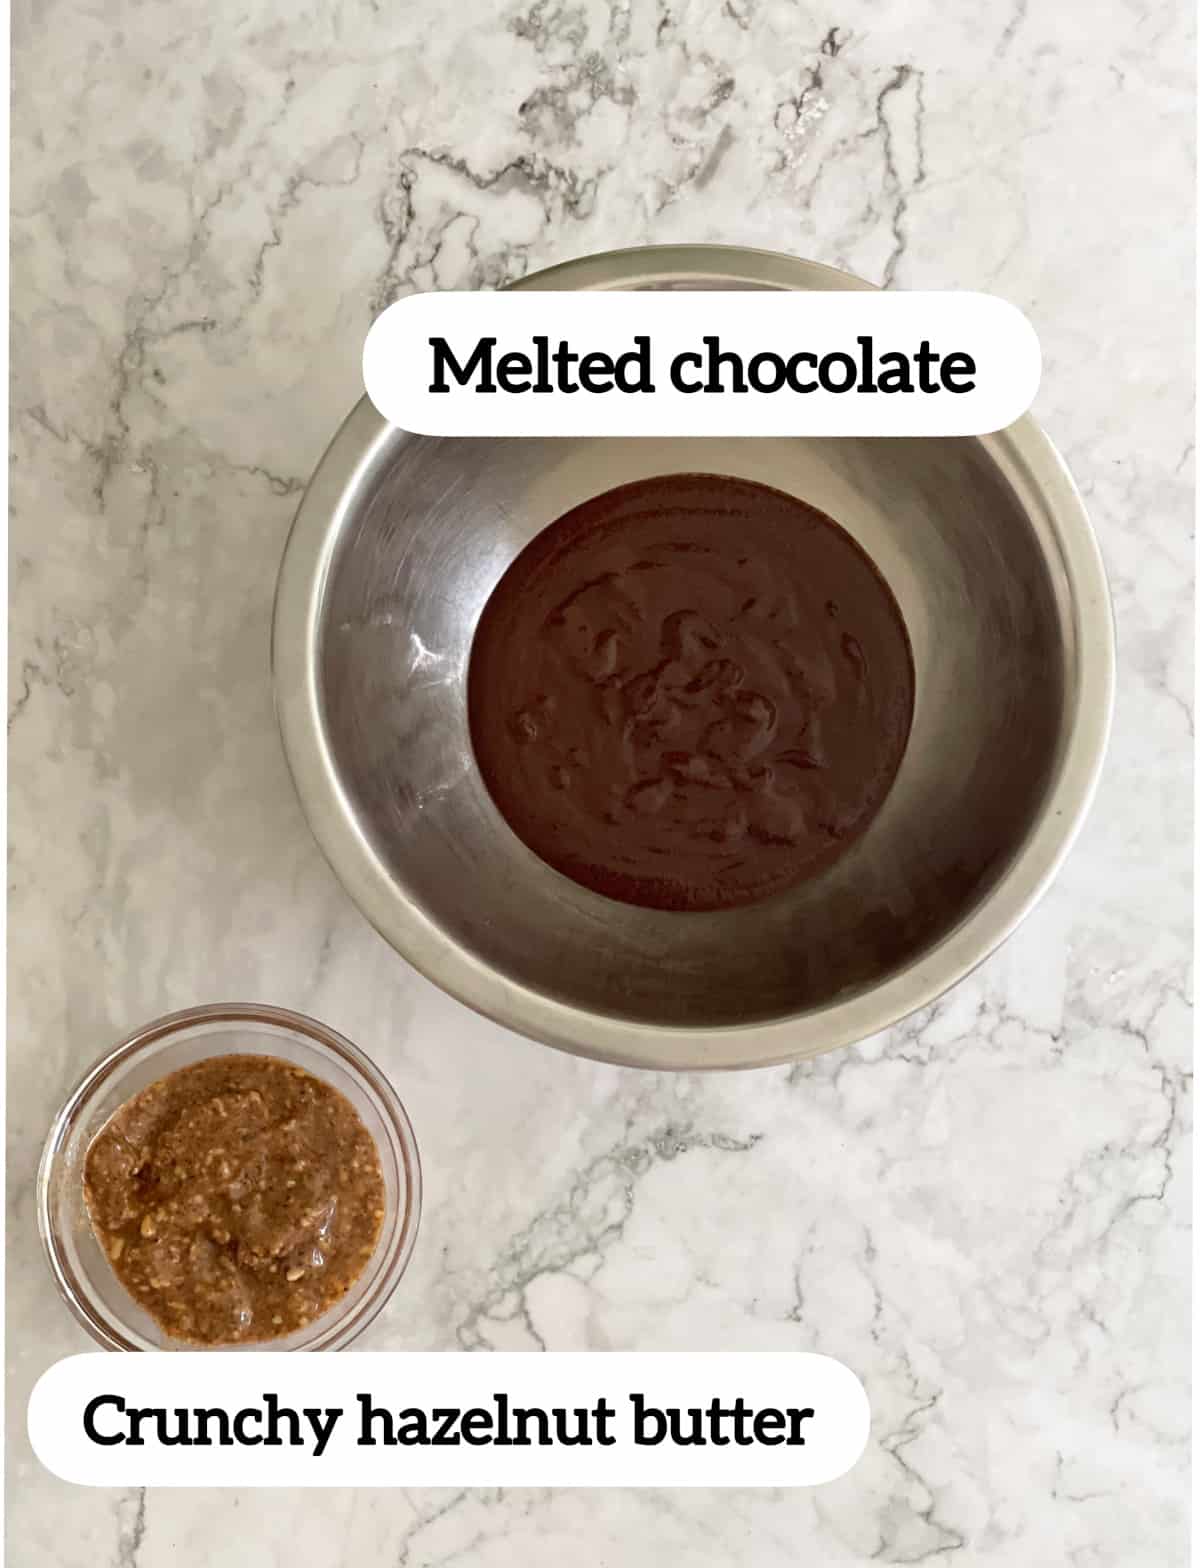
For the chocolate hazelnut layer (mini tart filling):
- Crunchy hazelnut butter: use organic crunchy hazelnut butter for the best texture (try to look for hazelnut butter without palm oil and without added sugar!). Also known as organic hazelnut paste (with no added ingredients).
- Dark chocolate (refined sugar free): I like to use my homemade chocolate in this for a fudgier taste (plus it is a healthier alternative to store-bought). You can use any dark chocolate (or milk chocolate) in this recipe, including chocolate chips. Note: the chocolate will need to be melted before mixing with the hazelnut butter.
- Whole hazelnuts (optional): you can garnish with roughly chopped hazelnuts for a little bit of an extra crunch!
These treats can also be made vegan by using my homemade chocolate or dairy-free by using dairy-free chocolate.
Variations and Substitutions
- Peanut butter and chocolate: replace peanut butter with hazelnut butter to make chocolate peanut butter tartlets!
- Orange and chocolate: add orange zest to the melted chocolate for a chocolate orange and hazelnut flavour!
- Toppings: mix and match toppings including toasted hazelnuts, sea salt, chopped chocolate or sliced strawberries.
SAVE this recipe! 📩
Equipment
- All you need is one bowl to make these treats and cupcake holders (which are freezer-friendly).
- I recommend using silicone cupcake holders as it is easier to remove the chocolate cups from them – plus this is eco-friendly/environment-friendly (as you can wash and reuse them).
- Alternatively, if you prefer, you can use a mini tart pan with removable base, although I find the silicone cupcake holders the easiest to use for this recipe.
How to make Chocolate Hazelnut Tartlets (No-Bake)
To make these chocolate tartlets, start by making the chocolate cups/shells:
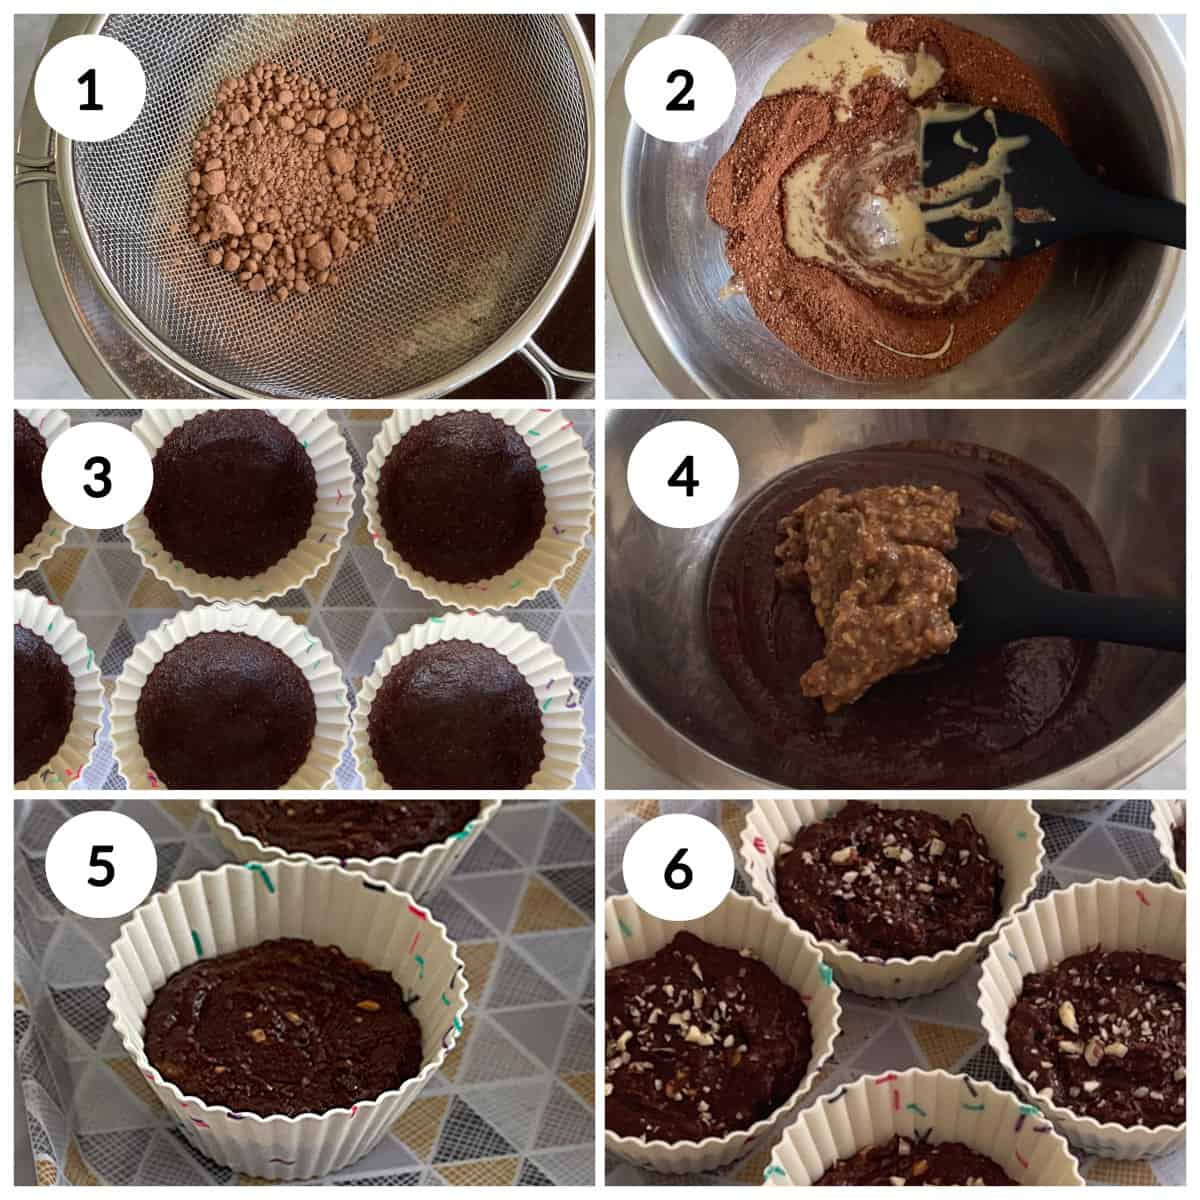
- Sift almond flour and cacao powder into a large bowl. Whisk to combine and remove any lumps.
- Add the maple syrup, tahini and vanilla extract. Add the wet ingredients and use a silicone spatula to combine into a sticky chocolate dough. This dough forms the base of the tartlets.
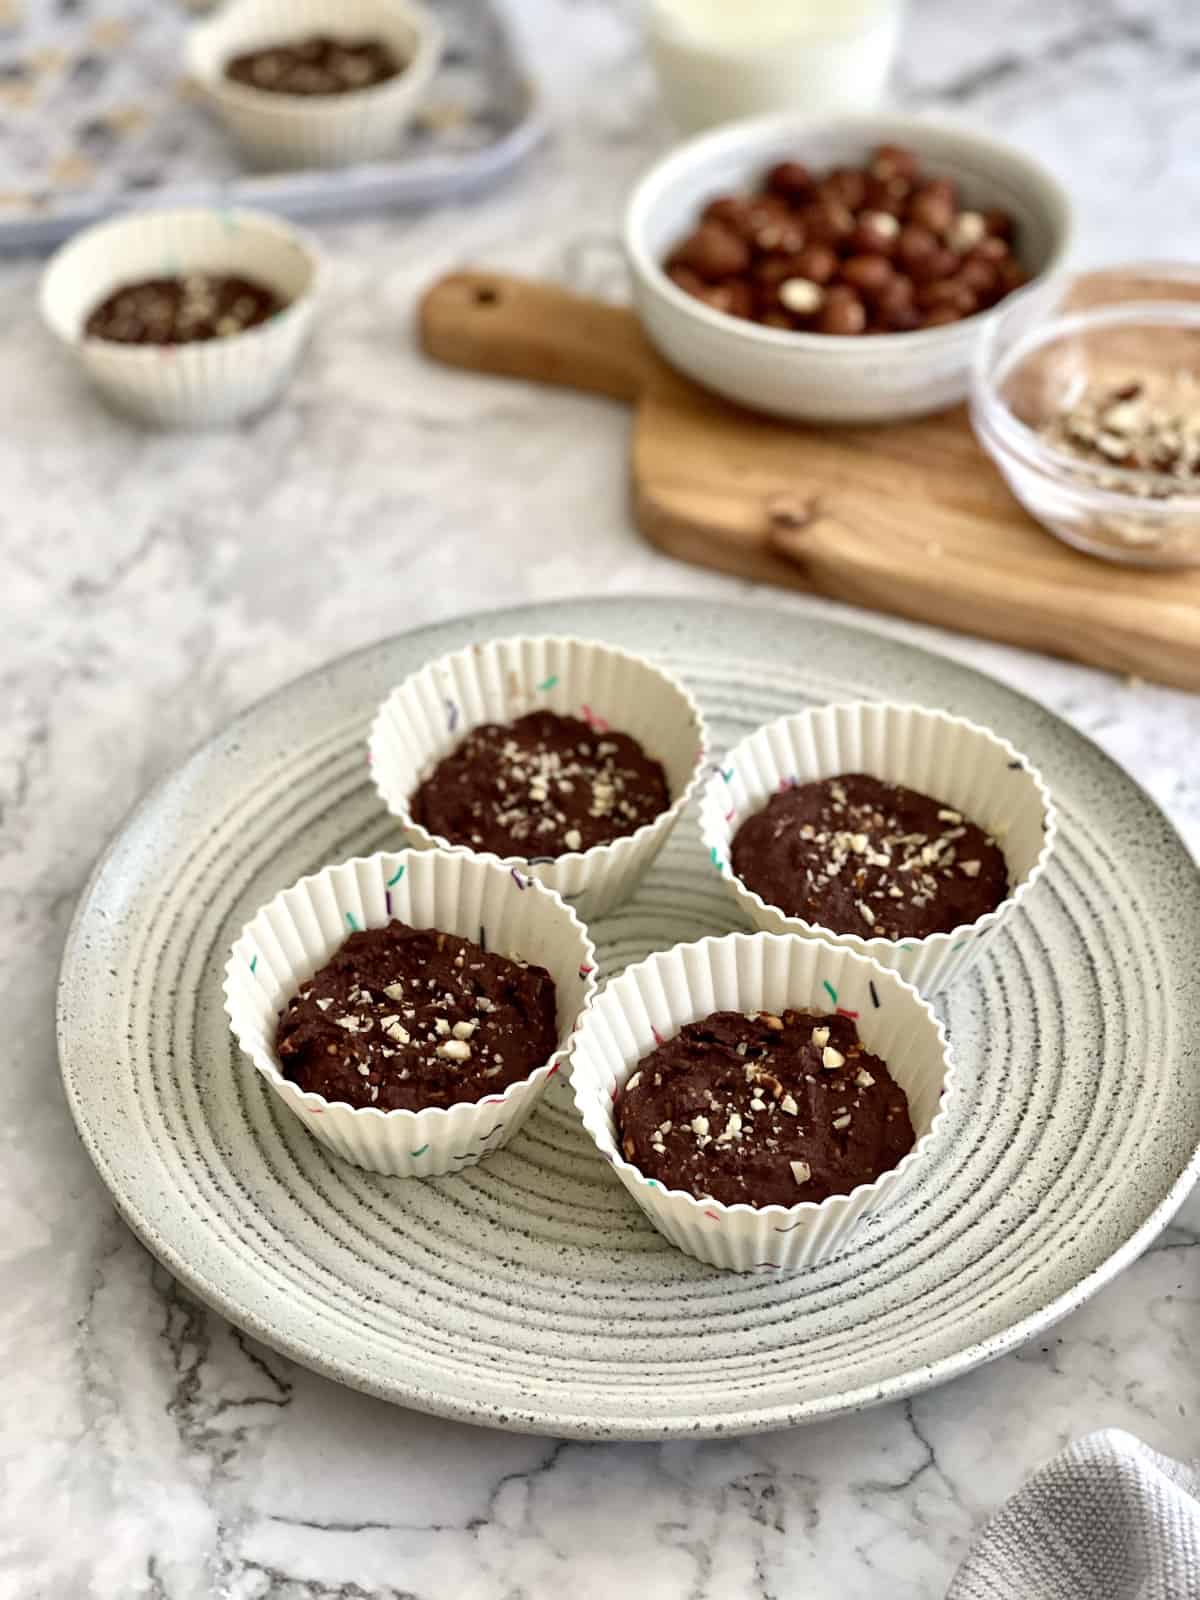
- Form into cups. Place 6 cupcake holders onto a tray. Divide the dough into 6 portions and place into each silicone cupcake holder. Use your hands to flatten the dough and press against the sides of the cupcake holder to form into cups. Transfer into the freezer for 5 minutes (while you make the chocolate hazelnut layer).
Next make the chocolate hazelnut layer (hazelnut and chocolate ganache):
- Mix the melted chocolate and hazelnut butter in a bowl to form a uniform mixture (use a spatula to help combine). Taste sweetness and adjust if desired by adding a teaspoon of maple syrup.
- Add the chocolate hazelnut layer on top of each the chocolate cups.
- Top with chopped hazelnuts and freeze for another 5-10 minutes. Serve these mini hazelnut tarts and enjoy!
Tips for the Best Chocolate Hazelnut Tartlets
- Use crunchy hazelnut butter: in this recipe the crunchy hazelnut butter works best for the crunchy texture. If you are using smooth hazelnut butter I recommend stirring in a some chopped hazelnuts for added crunch texture.
- Adjust sweetness: taste the hazelnut chocolate mixture and adjust sweetness. You can add another teaspoon of refined sugar-free maple syrup to the mixture before transferring into the chocolate cups. Note: dark chocolate and hazelnut have rich flavours so you may prefer adding sweetness based on taste preferences). Maple syrup will also give the chocolate hazelnut layer a fudgier consistency.
- Chocolate: if you are melting chocolate, you can either melt in a microwave-safe small bowl or using the double boiler method. This involves heating chocolate in a heatproof bowl over a small saucepan of water over medium heat.
How to serve
- These no-bake chocolate hazelnut tartlets are perfect as a snack, dessert or even a treat with your morning coffee!
- You can serve these with masala chai, homemade almond milk or coffee!
- For other hazelnut sweet snacks or desserts check out our easy hazelnut cookie dough!
How to Store
These chocolate hazelnut tartlets can be stored in the fridge for up to 5 days or freezer for up to 3 months.
Allow to sit at room temperature for 10-15 minutes before enjoying from the fridge or freezer.
Tips: Store in an air-tight container (which is freezer-friendly) and label to keep track of your treats! Arrange in a single layer. If you are arranging these tartlets without the silicone cases, use a piece of parchment paper to keep these from sticking together. Alternatively, wrap in cling film or plastic wrap.
Related
Looking for other recipes like this? Try these:

Chocolate Hazelnut Tartlets (Easy No-Bake Recipe)
Ingredients
Chocolate Tartlet Shells
- 31 g Almond flour or ¼ cup (packed)
- 12 g Cacao powder or 2 tbsp
- 25 g Tahini (runny) or 2 tablespoon
- 27 g Maple syrup (refined sugar-free) or 1 tablespoon + 2 teaspoon
- ¼ teaspoon Pure vanilla extract optional
Chocolate Hazelnut Layer
- 45 g Crunchy hazelnut butter
- 120 g Homemade chocolate (refined sugar-free (melted) or dark chocolate store-bought
- 1 teaspoon Maple syrup (refined sugar-free) (optional for extra sweetness)
- 1 tablespoon Hazelnuts (optional) (to garnish for extra crunch)
Instructions
To make the Chocolate Tartlet Shells
- Sift almond flour and cacao powder into a bowl. Whisk to combine and remove any lumps.
- Add the maple syrup, tahini and vanilla extract. Add the wet ingredients and use a silicone spatula to combine into a sticky chocolate dough.
- Place 6 cupcake holders onto a tray. Divide the dough into 6 portions and place into each silicone cupcake holder.
- Use your hands to flatten the dough and press against the sides of the cupcake holder to form into cups. Transfer into the freezer for 5 minutes (while you make the chocolate hazelnut layer).
To make the Chocolate Hazelnut Layer
- Mix the melted chocolate and hazelnut butter in a bowl to form a uniform mixture (use a spatula to help combine). Taste sweetness and adjust if desired by adding a teaspoon of maple syrup.
- Add the chocolate hazelnut layer on top of each the chocolate cups. Top with chopped hazelnuts and freeze for another 5-10 minutes. Serve and enjoy!
Notes
- Use crunchy hazelnut butter – you can get either smooth or crunchy hazelnut butter, in this recipe the crunchy hazelnut butter works best because of the texture and added crunch, if you are using smooth hazelnut butter I recommend mixing in chopped hazelnuts to give the added crunch texture
- Adjust sweetness – whether you are using homemade chocolate or store-bought dark chocolate, once you mix with the hazelnut butter, taste the mixture and if required you can add 1 teaspoon of maple syrup to the mixture before adding into the cups for sweetness (dark chocolate and hazelnut have rich flavours so you may prefer adding sweetness based on taste preferences). Maple syrup will also give the chocolate hazelnut layer a fudgier consistency.
- Variations – for a different flavour you can use peanut butter to make chocolate peanut butter tartlets or add orange zest to the melted chocolate for a chocolate orange and hazelnut flavour
- Storage: These chocolate hazelnut tartlets can be stored in the fridge for up to 5 days or freezer for up to 3 months. Store in an air-tight container (which is freezer friendly) and label to keep track of your treats!
Leave a Reply