These crispy, golden parathas are delicious and so easy and quick to make – and will be your new favourite flatbread! These tasty Indian flatbreads are so versatile and a must-have recipe!

Homemade Fresh Paratha
Have you ever tried a paratha?
These delicious Indian flatbreads are my favourite flatbreads of all time!
I love how versatile these flatbreads are! From curries and lentils to eggs, chutneys and dips - these parathas go with so many dishes!
Not to mention they are so fancy! Layered, flaky, crispy and golden... without the hassle of baking in the oven or worrying about the dough rising! If you haven’t tried parathas I am excited for you to try these and add them to your list of favourite flatbreads!
Jump to:
What is a paratha?
- A paratha is a popular South Asian flatbread made with whole wheat (or wholemeal) flour (also known as Chakki Atta), water and ghee (or oil).
- These are cooked and pan-fried on a tava (a non-stick flat frying pan/griddle).
- These flatbreads can either be made as plain parathas or stuffed parathas (including aloo paratha, gobi paratha and paneer paratha).
Why you'll love this paratha recipe
- Authentic delicious recipe with tips and tricks - This recipe has been made by generations and is always my go-to paratha recipe. I also include tips I have learnt along the way to make delicious parathas!
- So easy and quick to make – these parathas are straightforward to make. This post also has tips to help make these Indian flatbreads quickly!
- Versatile and fun - mix and match with your favourite dishes!
- Just THREE ingredients – that includes water! All you need is whole wheat flour, water and ghee (or olive oil as a substitute for ghee).
- No machine or oven required – these parathas only require a stove to cook them, you can make the dough in one bowl – no fancy machines or costly ovens required to make these delicious golden flatbreads – which is both convenient and cost effective.
- Suitable for freezing – these parathas are so easy to store – they will keep for up to 3 days in the fridge and up to 3 months in the freezer, which is convenient if you have leftovers (on the off chance).
- Mix it up and adjust as preferred – this recipe is the foundation of paratha making and once you master the art of plain parathas, you can mix it up with fillings, spices and so many different flavours – including aloo paratha, gobi paratha and cheese chilli paratha.
Notes on Ingredients
- Whole wheat flour (or wholemeal flour): also known as Chakki Atta. This is a powdery pale brown flour made from the whole grain of wheat, I recommend using 100% whole wheat flour from a good brand (I use and highly recommend Pilbury Chakki Atta).
- Water: this is used to make the dough, once mixed with the whole wheat/wholemeal flour.
- Ghee: Incorporating a small drop of ghee (which is clarified butter) when making the dough and also for frying and cooking the parathas. Ghee adds a richness to the parathas and helps to make them crispy and soft. You can buy store-bought ghee or make homemade ghee using butter. If you do not have ghee, you may substitute for the same amount of olive oil.
Equipment
- Tava/tawa pan: I recommend using a non-stick tava pan (also known as a tawa) with a handle, which is a large round, flat and slightly curved pan used to make a variety of flatbreads. If you do not have a tava, you can use a large flat frying pan (with a handle) instead.
- Spatula and brush/spoon: You will also need a spatula to flip the naan.
- Rolling pin: this is used to roll out the dough to make each naan.
Instructions
- Prepare the dough. Add whole wheat flour (atta) into a large bowl, slowly add warm water and mix together and knead to form a sticky dough.
- Cover and allow to rest for 15 minutes. Cover the bowl with a clean towel (or plate) and set aside for 15 minutes to allow the dough to rest.
- Knead the dough on a clean worktop/in the bowl to ensure soft dough consistency. Rub the dough with a small amount of ghee or oil for ease of kneading.
- Divide the dough into mini round balls. (Tip: you can weigh each one to approx. 105g).

- Roll out into a round flatbread shape. Roll each ball into a thin, round flatbread on a floured surface. (Tip: sprinkle with flour to help roll each of the dough balls easily).
SAVE this recipe! 📩

- Fold into a square shape. Gently brush the round flatbread with some ghee, then sprinkle a pinch of wheat flour and fold into a square.
- Tip: fold the top third of the flatbread towards the middle and gently press, then fold the bottom third of the circle towards the middle and press again, then fold the left third into the centre, repeat with the right third). Once you have layered the dough into a square shape, dip it back into the plate of flour gently and set aside. Repeat for the remaining dough balls until you have used all the dough.

- Roll out each square into a flat square-shaped flatbread. As you start rolling out the dough you can dip back into the flour and dust off to help roll out the dough (alternatively you can sprinkle some flour onto the dough).

- Cook the parathas. Transfer the square-shaped flatbread onto a preheated tava/frying pan. Cook for 2-4 minutes per side, flipping every few minutes. Brush with ghee during cooking until crispy and golden. Tip: use a spatula to flip the paratha and silicone brush to spread ghee over the paratha as it starts to cook to help it become crispy. Repeat for the remaining dough/flatbreads, creating a stack of crispy, golden parathas!

Tips to make the perfect paratha
- Allow resting time: by resting the dough for 15 minutes it allows enough time for the water to be absorbed by the dough and helps to make the parathas soft
- Use a pre-heated tava: preheat the tava on low-medium heat, this will help cook the paratha at the right temperature and prevent the paratha from sticking to the pan.
- Use ghee: ghee helps to make golden parathas which are crispy, rich and soft
- Cook on low/medium heat: this helps to evenly cook the paratha and prevent them from burning
- Ensure dough is kneaded to appropriate consistency: we want the dough to be soft, not too hard (this happens when you have too much flour) or too sticky (when there is too much water). To do this you need the right balance of flour and water. It is also important the dough is kneaded appropriately to ensure ingredients are well mixed.
- Roll the dough gently with the rolling pin: This helps to create even parathas and keeps them from sticking to the worktop (if you roll them too hard the force will make them stick to your worktop, this could make you use extra flour, which will make the parathas tough and reduce their softness).
- Cook and roll simultaneously: this is a time-saving tip – in the method above, you’ll notice I recommend cooking the paratha whilst rolling out the squares, this helps you save time and make the parathas faster.
Storage tips
- These parathas can be kept for up to 3 days in the fridge and up to 3 months in the freezer.
- To pack and store in the fridge, transfer cooled stack of parathas onto a paper towel/kitchen towel and wrap with foil and seal to keep airtight.
- To pack and store in the freezer, line each paratha with parchment/baking paper and wrap with foil and seal to keep airtight. You can also check out these tips on how to freeze flatbreads including parathasfor more detailed instructions.
- To reheat, gently wet the paratha under a running tap and allow to slowly heat on a preheated tava on low heat, using your spatula to keep flipping the paratha to evenly cook both sides.
How to serve
- Parathas are so versatile and can be served at any time of the day – including breakfast or lunch and dinner!
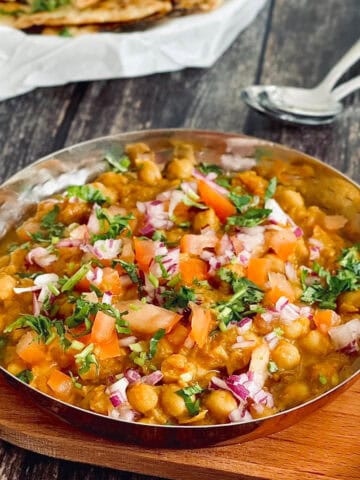
- Serve fresh paratha with main dishes including curry, chana masala or daal with a cup of masala chai with milk.
- Parathas can also be enjoyed with butter, yoghurt, salt and pepper.
Related
Looking for other delicious recipes from the Indian cuisine? Try these:
Fancy something sweet?
Check out these delicious sugar-free/refined sugar-free desserts and sweet snacks:


Plain Paratha
Ingredients
- 500 g Whole wheat / wholemeal flour (Chakki Atta)
- 390 ml Water 390ml
- 2-4 tbsp Ghee to fry paratha, (plus optional ¼ teaspoon for dough)
Instructions
- Add whole wheat flour (atta) into a large bowl, slowly add warm water and mix together and knead to form a sticky dough.
- Cover with a clean towel and allow dough to rest for 15 minutes.
- Knead the dough on a clean worktop/in the bowl to ensure soft dough consistency. Rub the dough with a small amount of ghee or oil for ease of kneading.
- Divide the dough into mini round balls. (Tip: you can weigh each one to approx. 105g).
- Roll each ball into a thin, round flatbread on a floured surface. (Tip: sprinkle with flour to help roll each of the dough balls easily).
- Gently brush the round flatbread with some ghee, then sprinkle a pinch of wheat flour and fold into a square (see above for detailed step-by step with images).
- Roll out each square into a flat square-shaped flatbread, dusting with flour to help roll easily.
- Transfer the square-shaped flatbread onto a preheated tava/frying pan and cook for 2 minutes per side. Brush with ghee during cooking until crispy and golden. Tip: use a spatula to flip the paratha and silicone brush to spread ghee over the paratha. Repeat for the remaining dough/flatbreads, creating a stack of crispy, golden parathas!
Notes
- Allow resting time: by resting the dough for 15 minutes it allows enough time for the water to be absorbed by the dough and helps to make the parathas soft.
- Use a pre-heated tava: preheat the tava on low-medium heat, this will help cook the paratha at the right temperature and prevent the paratha from sticking to the pan.
- Roll the dough gently with the rolling pin: This helps to create even parathas and keeps them from sticking to the worktop (if you roll them too hard the force will make them stick to your worktop, this could make you use extra flour, which will make the parathas tough and reduce their softness).
- Cook and roll simultaneously: this is a time-saving tip – in the method above, you’ll notice I recommend cooking the paratha whilst rolling out the squares, this helps you save time and make the parathas faster.
- Storage: These parathas can be kept for up to 3 days in the fridge and up to 3 months in the freezer. To pack and store in the fridge, transfer cooled stack of parathas onto a paper towel/kitchen towel and wrap with foil and seal to keep airtight. To pack and store in the freezer, line each paratha with parchment/baking paper and wrap with foil and seal to keep airtight.

Leave a Reply